
Lets distribute our apps with firebase distribution and azure devops pipelines
Whenever we are developing apps we need to distribute them somehow, at least while working with QA teams it is needed to constantly send them builds.
Instead of generating APK's or AAB's, and uploading them to distribution center like firebase or appcenter, we can directly automate this process using pipelines.
In order to achieve this we are going to:
- Set up a firebase project and basic android project for distribution
- Build your android project
- Experiment with firebase CLI (optional)
- Create a pipeline
- Use AppTester
Create an android Project
Create an android project or use an existing one.
Modifications to gradle files will be done in the "Create a firebase project" setup steps 7-9
Create a firebase project
Creating a firebase project is very straightforward, it only needs a couple of steps
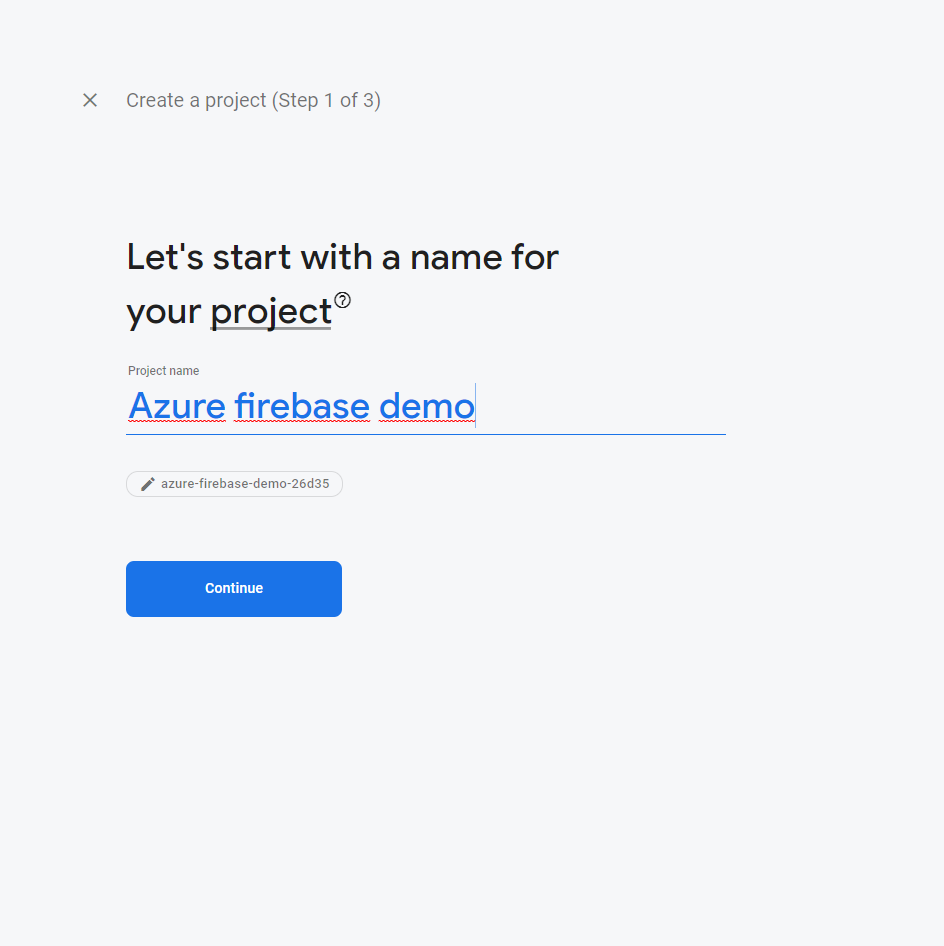
Step 1
You need to create an account at firebase console
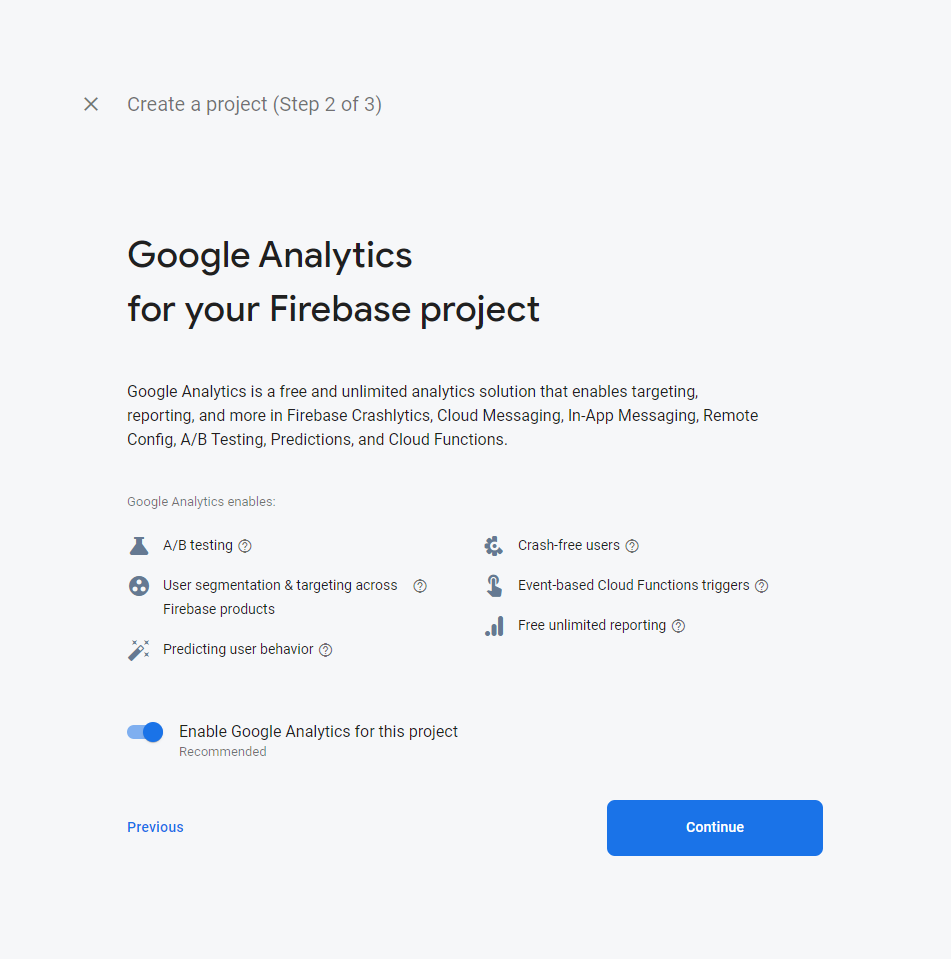
Step 2
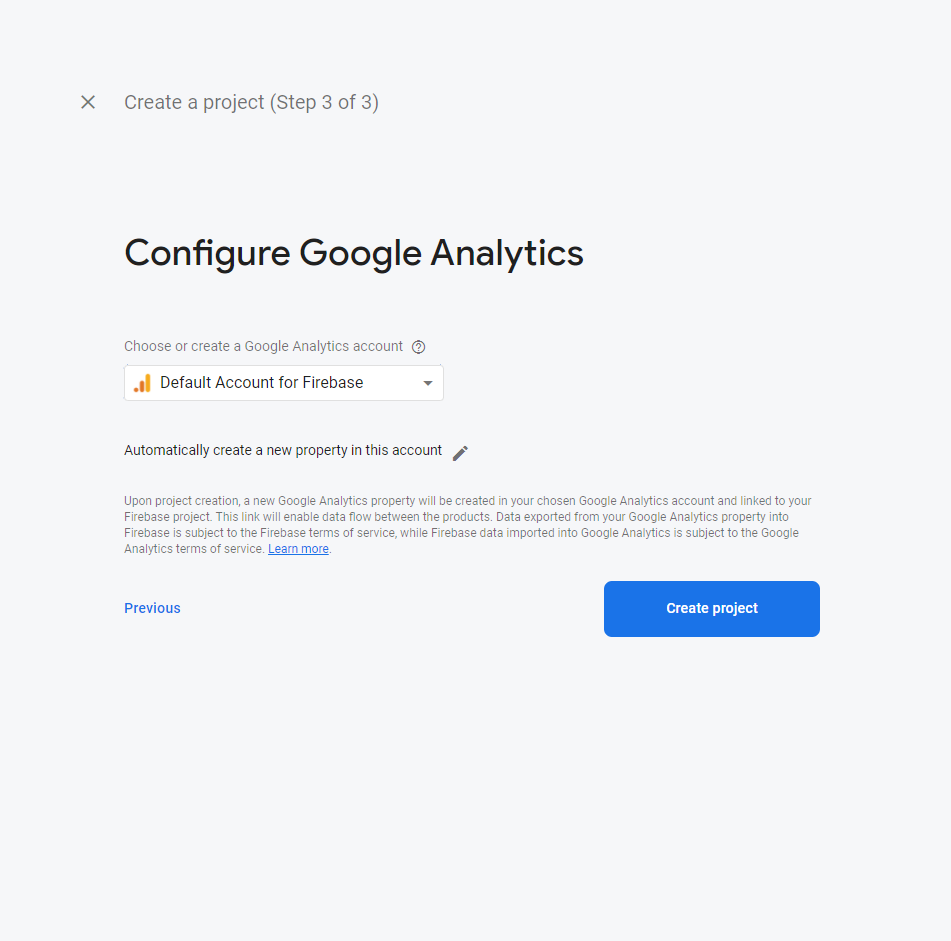
Step 3
Step 4
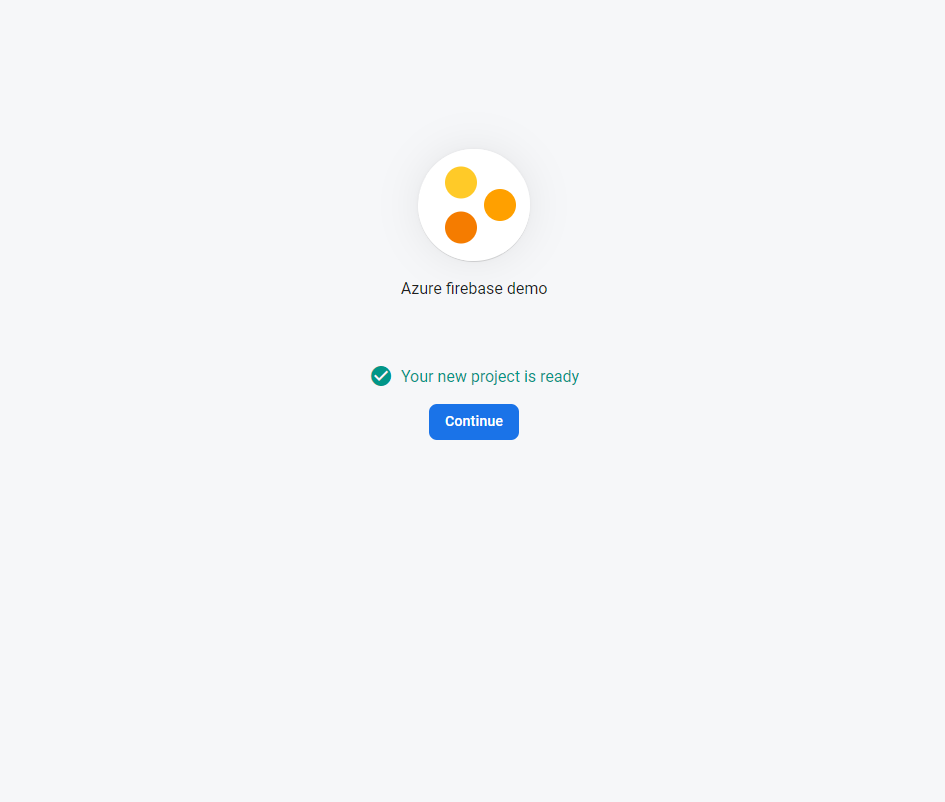
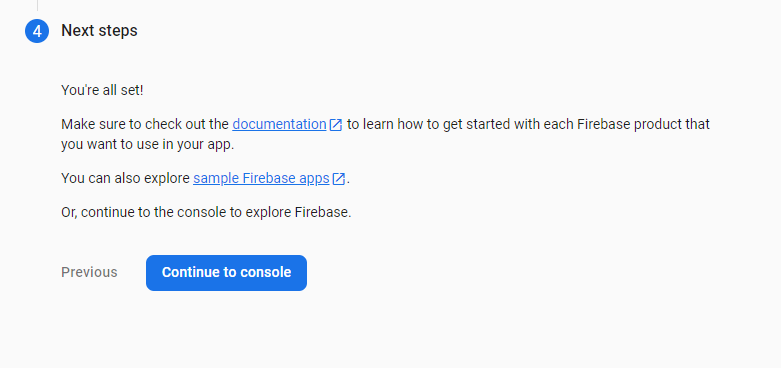
Step 5
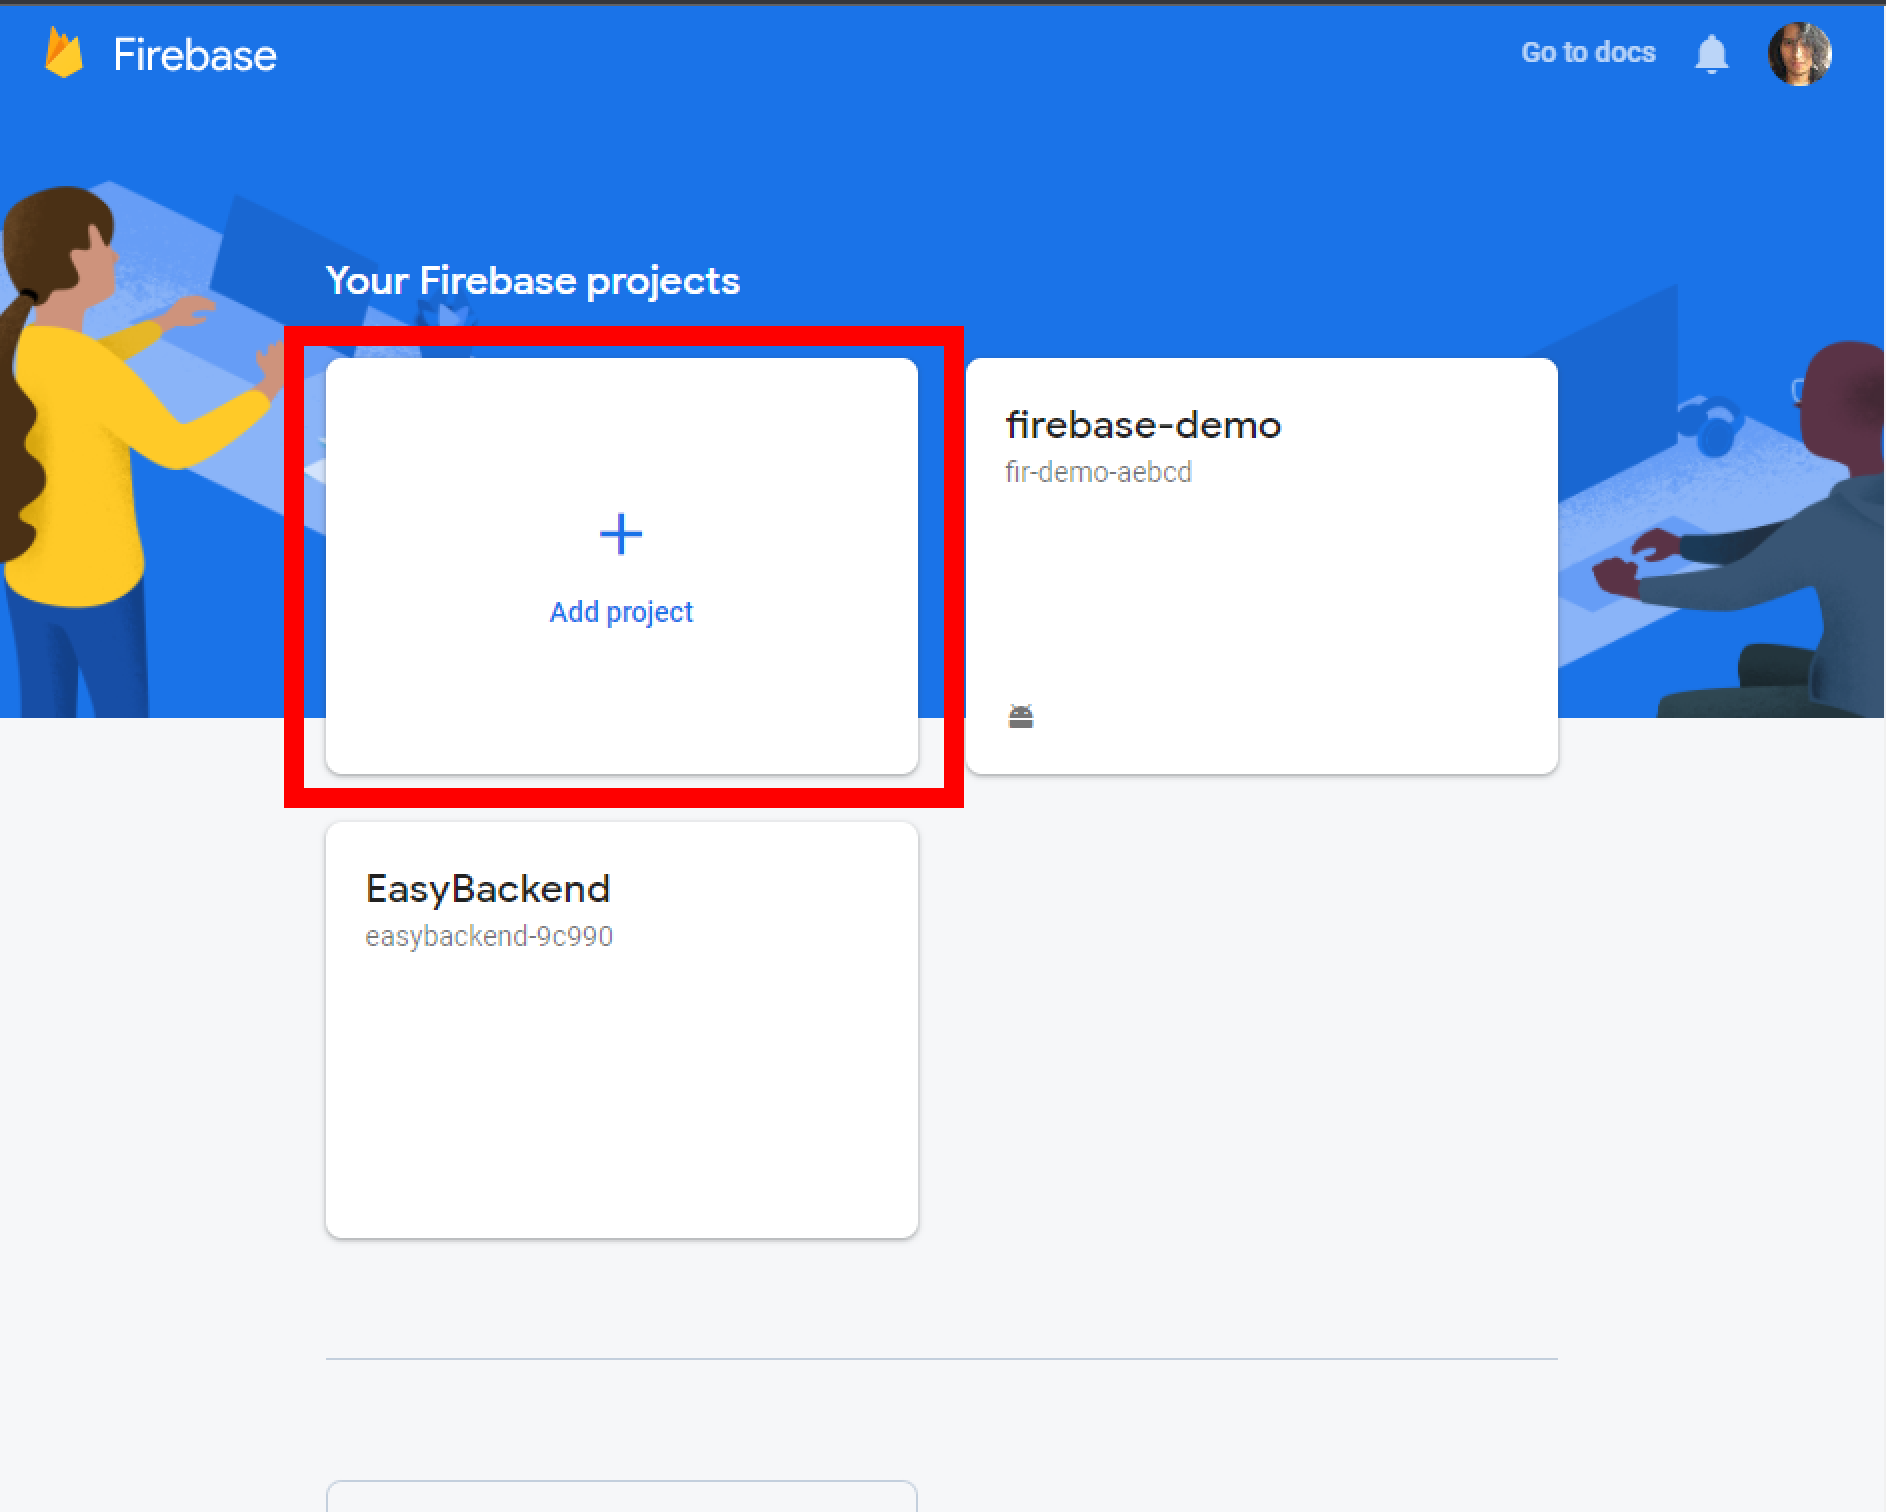
Project is ready to use, you can click on continue or go to console main page
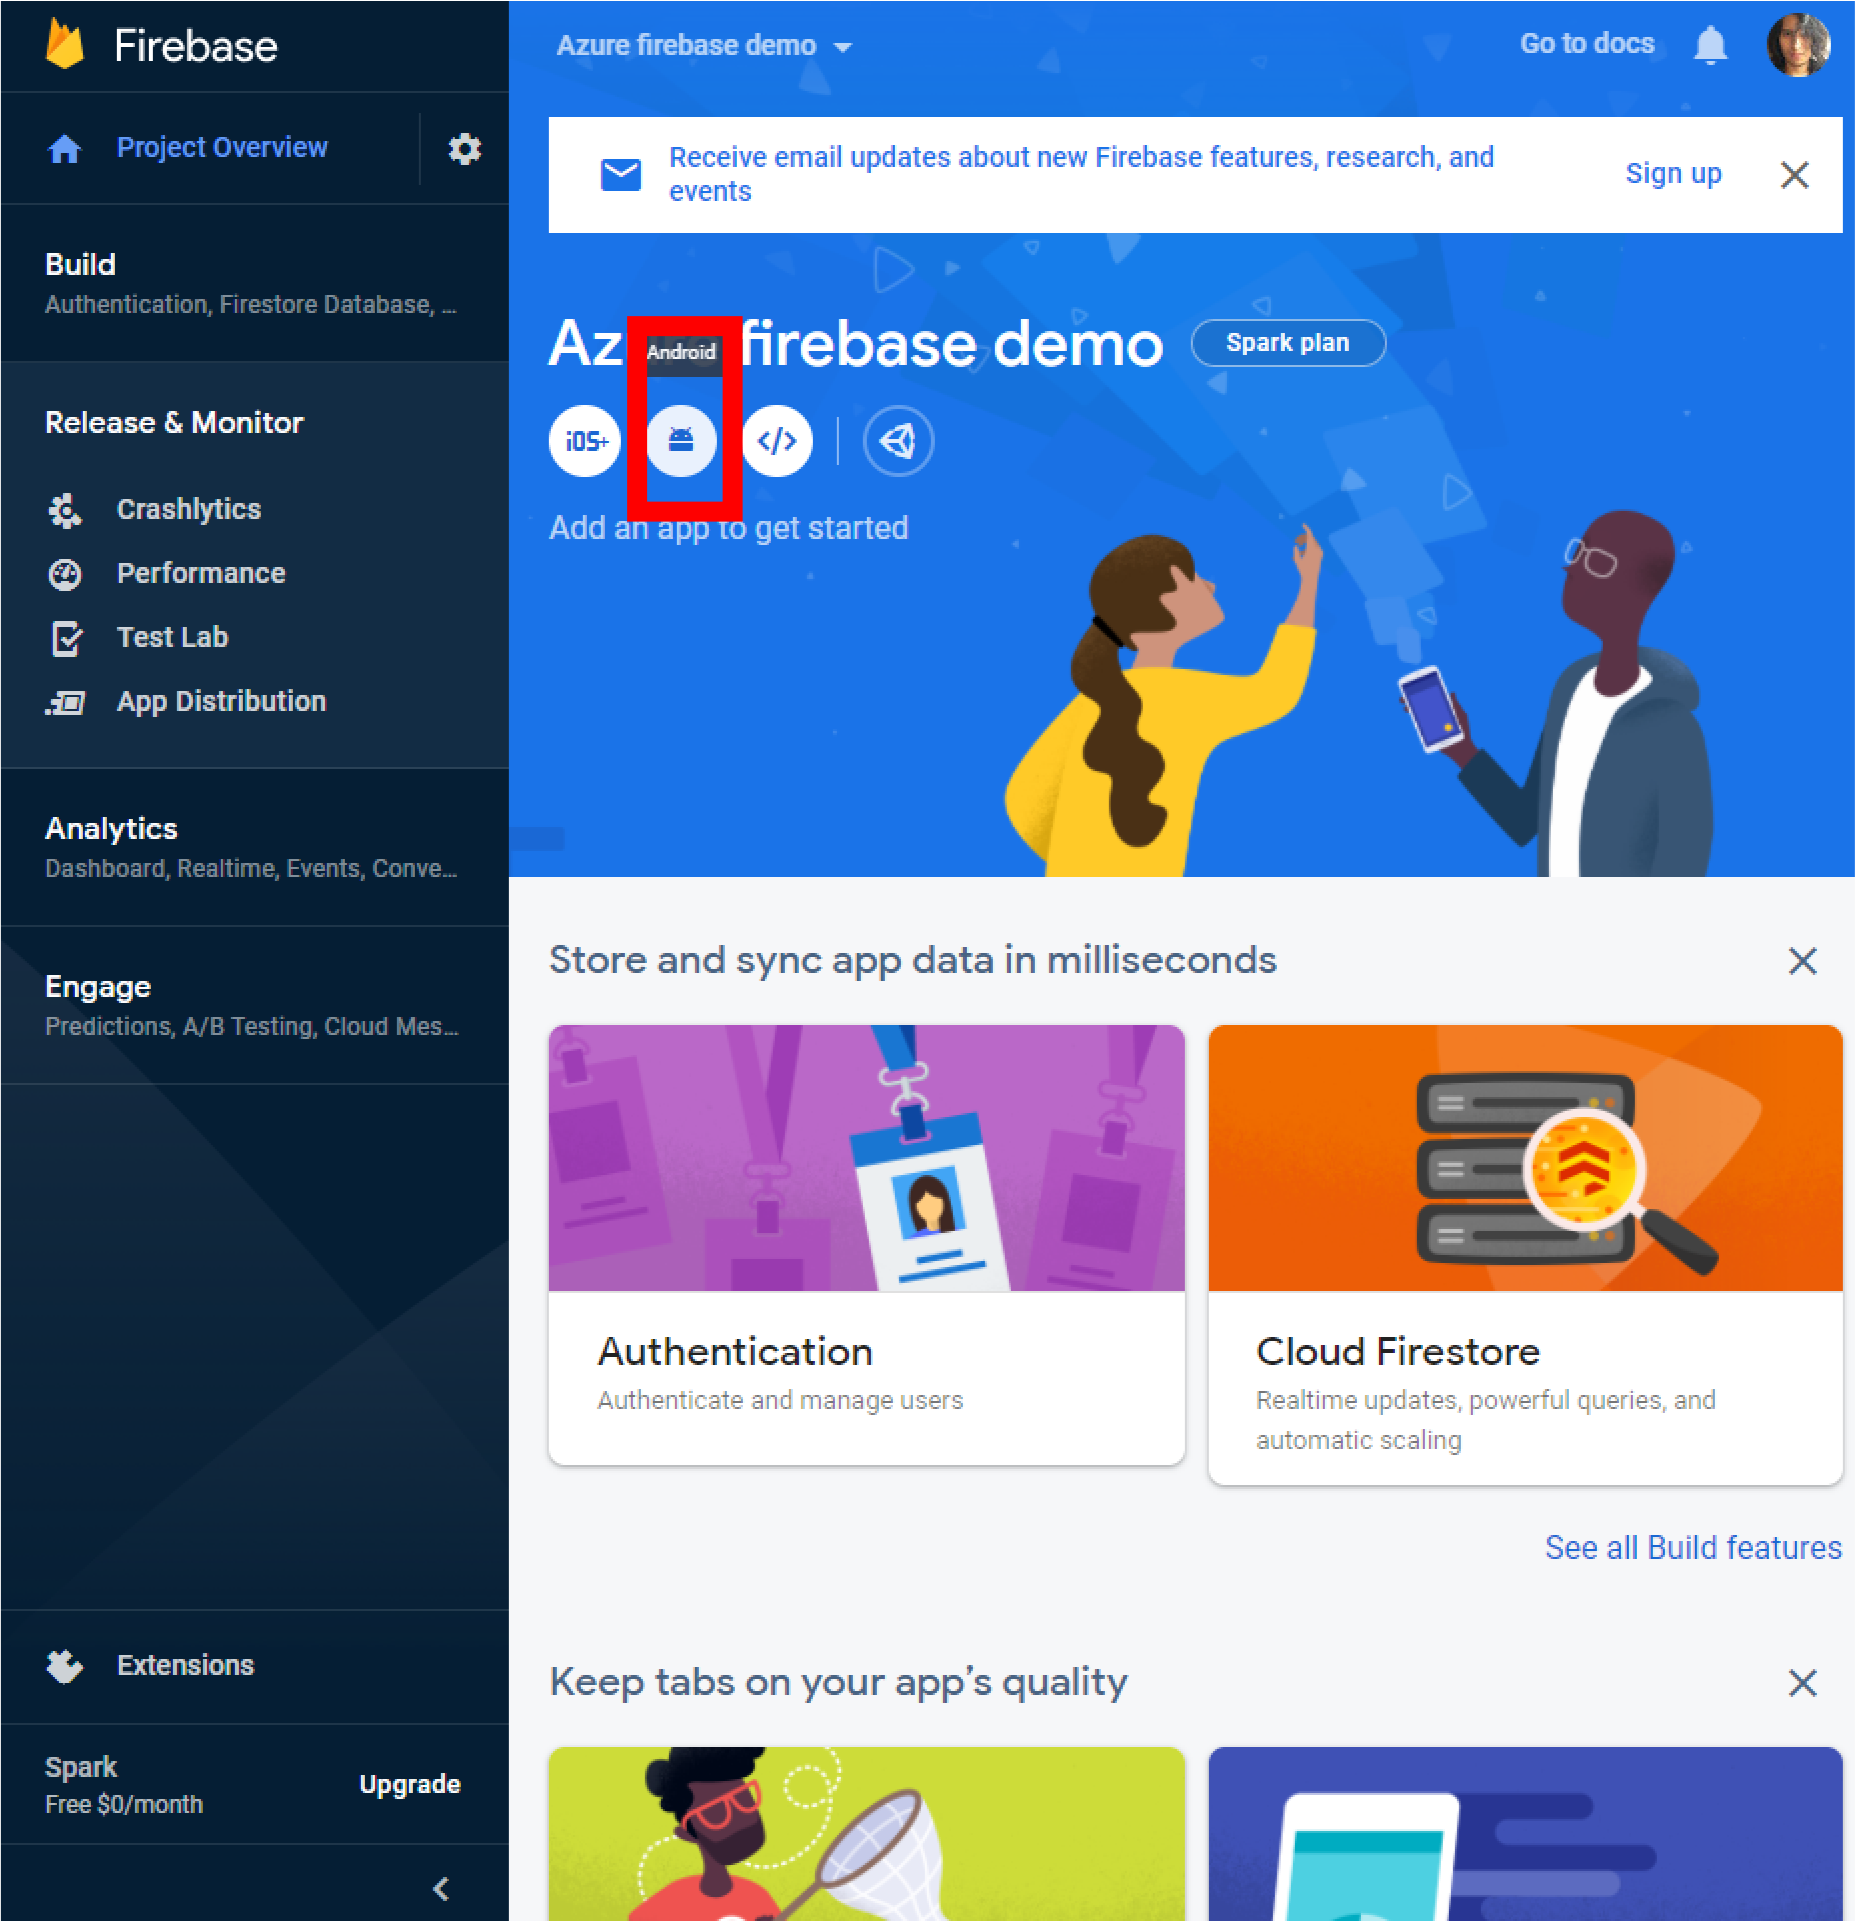
Step 6
In this step you are going to create an android project
Click on the android logo pointed by the red rectangle
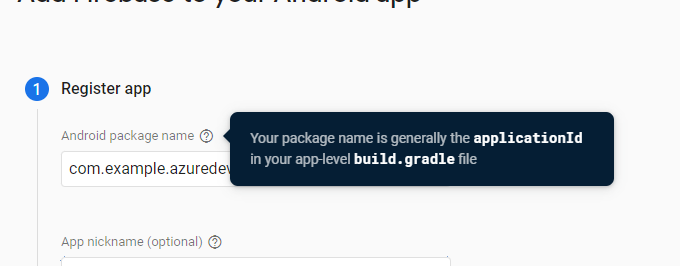
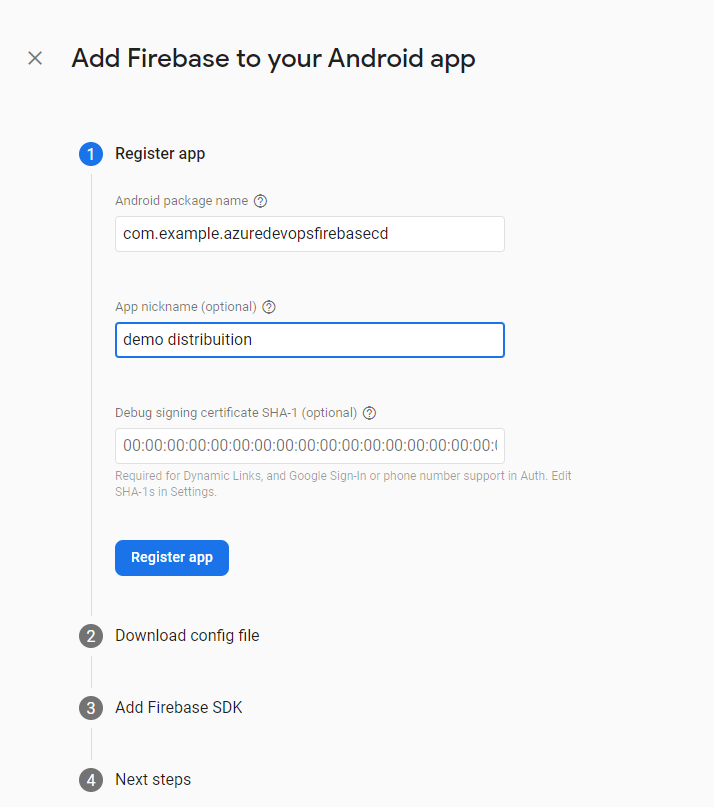
Step 7
It is necessary the package name, you need to go to your build.gradle file in your project and look for that.
Optionally you can add an app nickname (you probably should), and a certificate
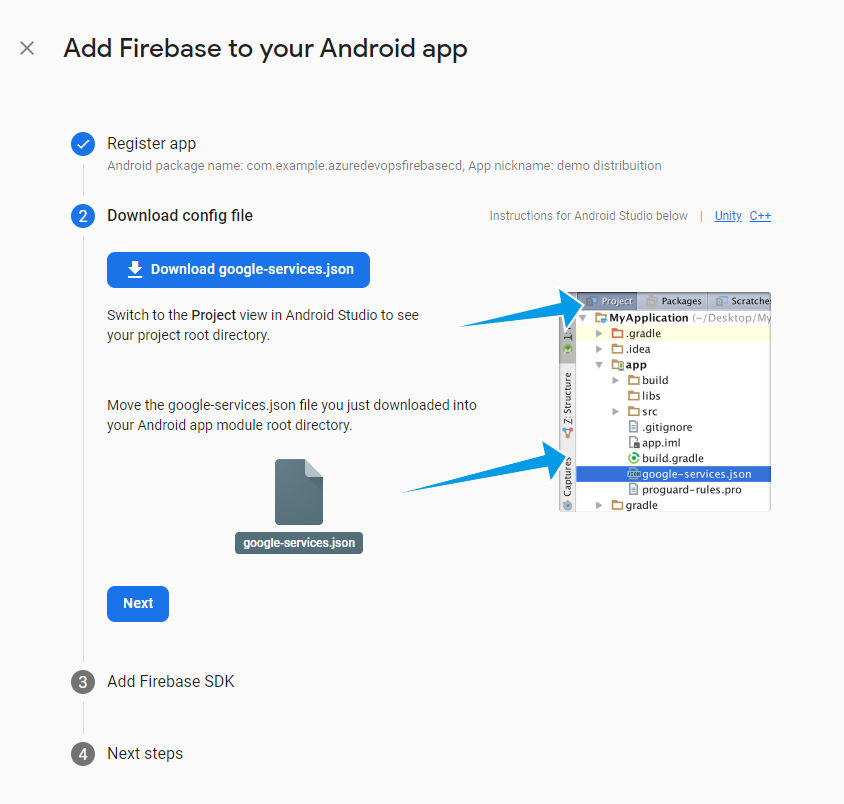
Step 8
You need to download the json file , just follow the instructions in the image
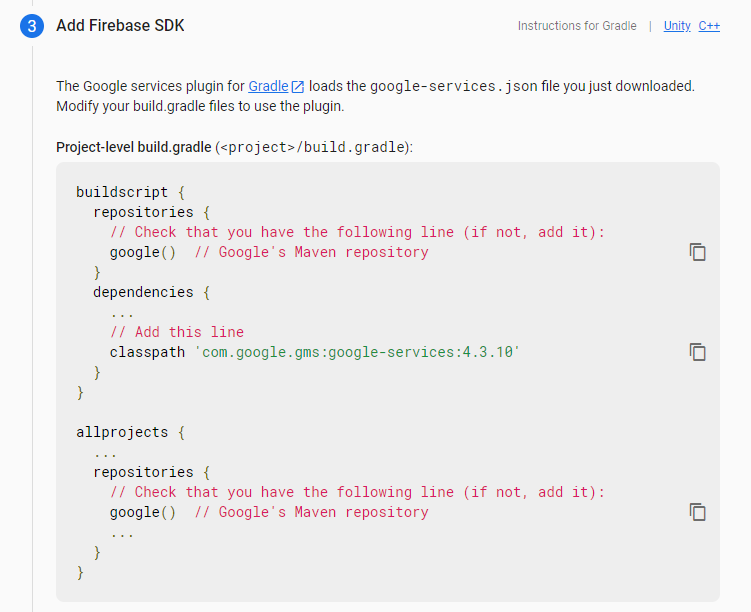
Step 9
You need to add the dependencies in the gradle file
This is how it looks in my current project :
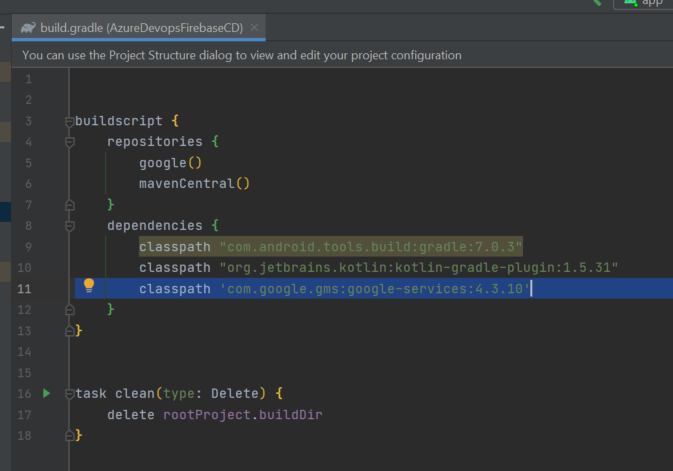
In case you want to copy paste
buildscript {
    repositories {
        google()
        mavenCentral()
    }
    dependencies {
        classpath "com.android.tools.build:gradle:7.0.3"
        classpath "org.jetbrains.kotlin:kotlin-gradle-plugin:1.5.31"
        classpath 'com.google.gms:google-services:4.3.10'
    }
}


task clean(type: Delete) {
    delete rootProject.buildDir
}
Additionally you have to modify the app-level build.gradle file
plugins {
    id 'com.android.application'
    id 'kotlin-android'
    id 'com.google.gms.google-services'
}

android {
    compileSdk 31

    defaultConfig {
        applicationId "com.example.azuredevopsfirebasecd"
        minSdk 21
        targetSdk 31
        versionCode 1
        versionName "1.0"

        testInstrumentationRunner "androidx.test.runner.AndroidJUnitRunner"
    }

    buildTypes {
        release {
            minifyEnabled false
            proguardFiles getDefaultProguardFile('proguard-android-optimize.txt'), 'proguard-rules.pro'
        }
    }
    compileOptions {
        sourceCompatibility JavaVersion.VERSION_1_8
        targetCompatibility JavaVersion.VERSION_1_8
    }
    kotlinOptions {
        jvmTarget = '1.8'
    }
}

dependencies {

    implementation 'androidx.core:core-ktx:1.7.0'
    implementation 'androidx.appcompat:appcompat:1.4.0'
    implementation 'com.google.android.material:material:1.4.0'
    implementation 'androidx.constraintlayout:constraintlayout:2.1.2'
    testImplementation 'junit:junit:4.+'
    androidTestImplementation 'androidx.test.ext:junit:1.1.3'
    androidTestImplementation 'androidx.test.espresso:espresso-core:3.4.0'
    implementation platform('com.google.firebase:firebase-bom:29.0.3')
    implementation 'com.google.firebase:firebase-analytics-ktx'
}
Step 10
After all the modifications, you are ready
As you can see the app is already displayed in the console.
Notice that app nickname is displayed
Build your android project
Basically you only need the apk or aab file, so if you already have one of these, you can skip to the next section
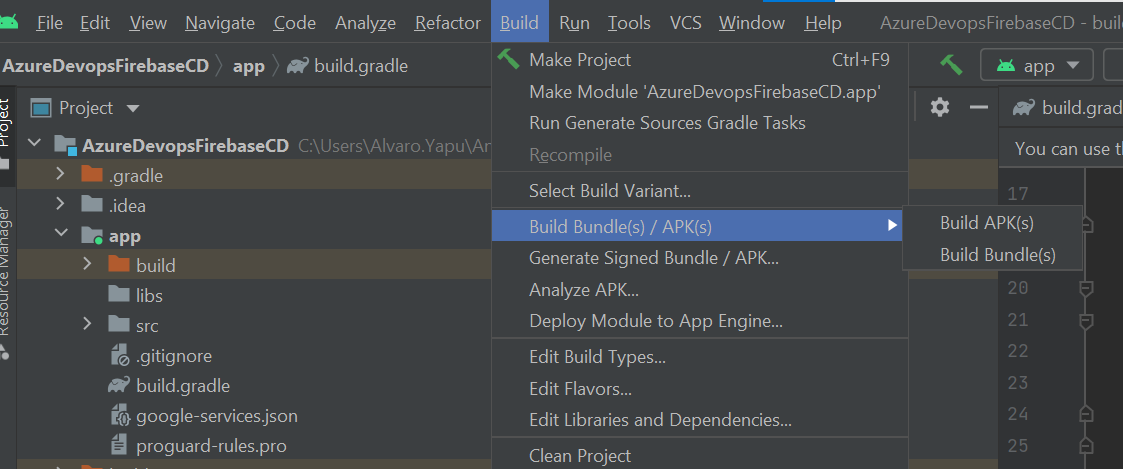
For generating a build just go to
Build > Build Bundle(s)/ APK(s) > Build APk(s) or Bundle
Once the build is finished you need to locate it, there will be a notification in the lower right corner, you can click the locate button and it will open the explorer with apk location. In case there is not any notification you can click the Event Log, locate at the same position, to check what happened to the build
Set up the azure pipeline
Lets work first with firebase cli
Depending on the OS you are using you can have several ways to install the CLI, but we are going to use npm.
Go to firebase docs, and follow the instructions
npm install -g firebase-toolsOnce you are done with the install process you can check it by asking the version
firebase --version
9.16.5
Note: It is recommended to use this version or superior.
If everything is correct the version will be printed, otherwise you might want to check again the docs for help
Step 1: Login
Basically there are two ways one can login to firebase
First is running:
firebase login 
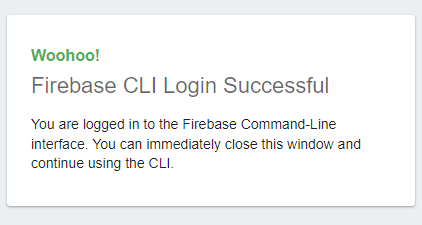
It will ask you for permission to collect some reporting information, you can say Yes or No , after that a new tab will be opened in your browser in order to login to your google account.
When you login correctly the next message will be displayed
Go back to your terminal and now you are logged , you can check that by typing
firebase login:listIt will show your logged email account
The second way to login is by using a token, you are going to use this way for the pipeline, why ? because it is a non-interactive login , in the first way , the login process requires a user to login manually by going into the browser.
Before doing anything logout from firebase cli
firebase logoutSo now you are going to introduce this command
firebase login:ciEven though this command will still ask you to go to your browser and login to your google account , this will give you a token
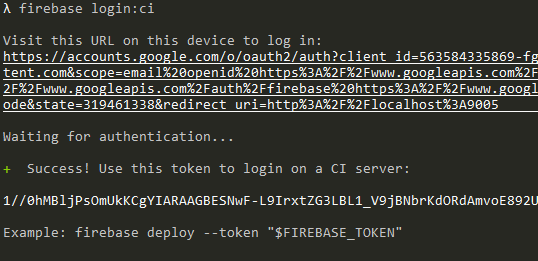
This token you can use it in any machine, you no longer will need to login , you can directly use this token in every firebase operation you do , so save this token carefully

All right, since you build an apk in the previous section you are going to use it now:
firebase appdistribution:distribute app-debug.apk --token TOKEN --app 1:329560641701:android:bbf839ba9b082200db7d4c --release-notes "Upload with token"
- appdistribution:distribute
This is for the type of operation you are going to do. - --token
This is where you are going to introduce your token - --app
This is the id of the app that we got in the Create a firebase project section last step - --release-notes
Additionally you can add some release notes
There are many other parameters that you can use , but these ones are enough at the moment, in another post we are going to explore in deep the firebase cli
And you will get this output after last command
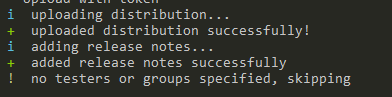
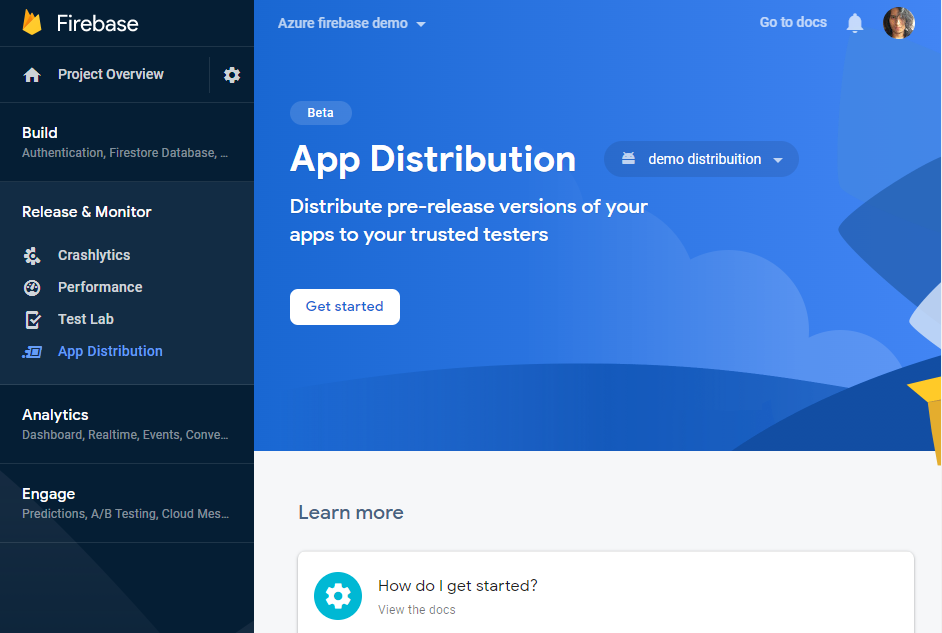
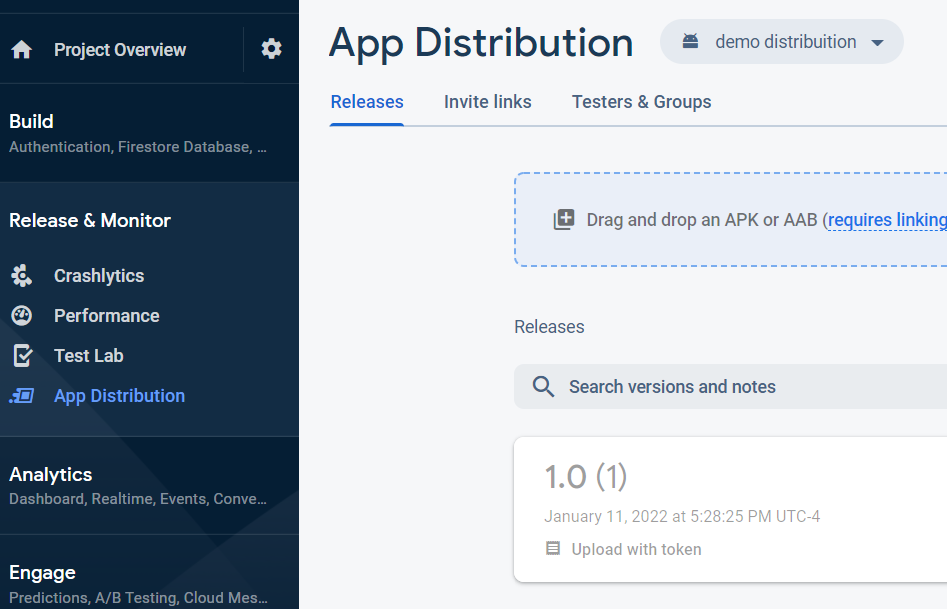
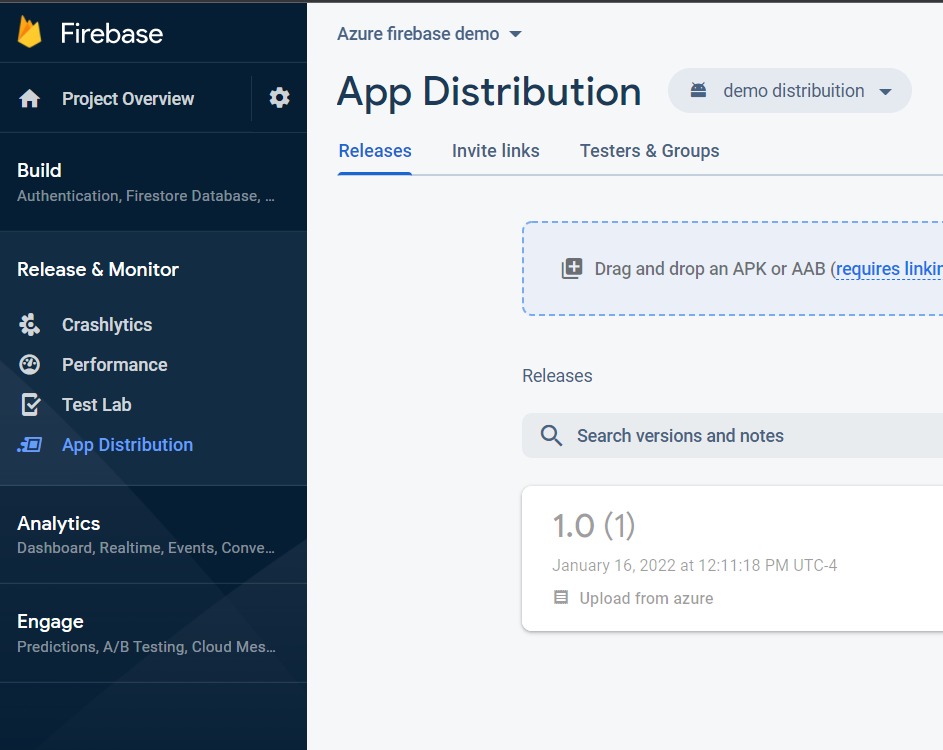
You can go to your firebase project and check it, in Release & Monitor > App Distribution
You are ready for the next section, so why did we do all this stuff manually if we are going to automate via the pipeline?
Because sometimes you have misconfigured the pipeline, and you can waste a lot of time trying to figure out what is wrong. This happened to me once with appcenter :(
Create a pipeline
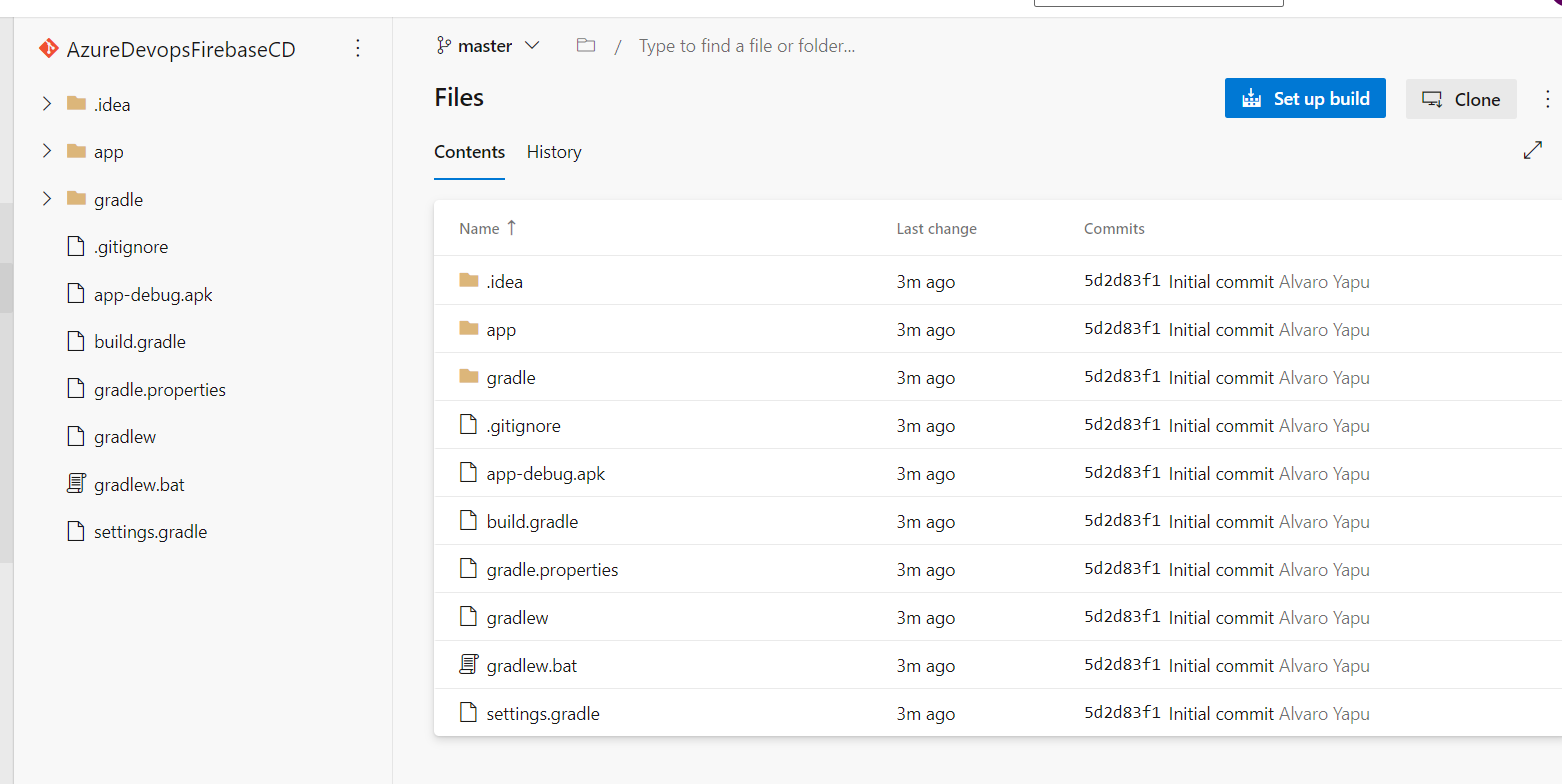
Step 1: Upload your project to azure devops
I'm not going to show how to upload your project , if you have any problems please check the docs
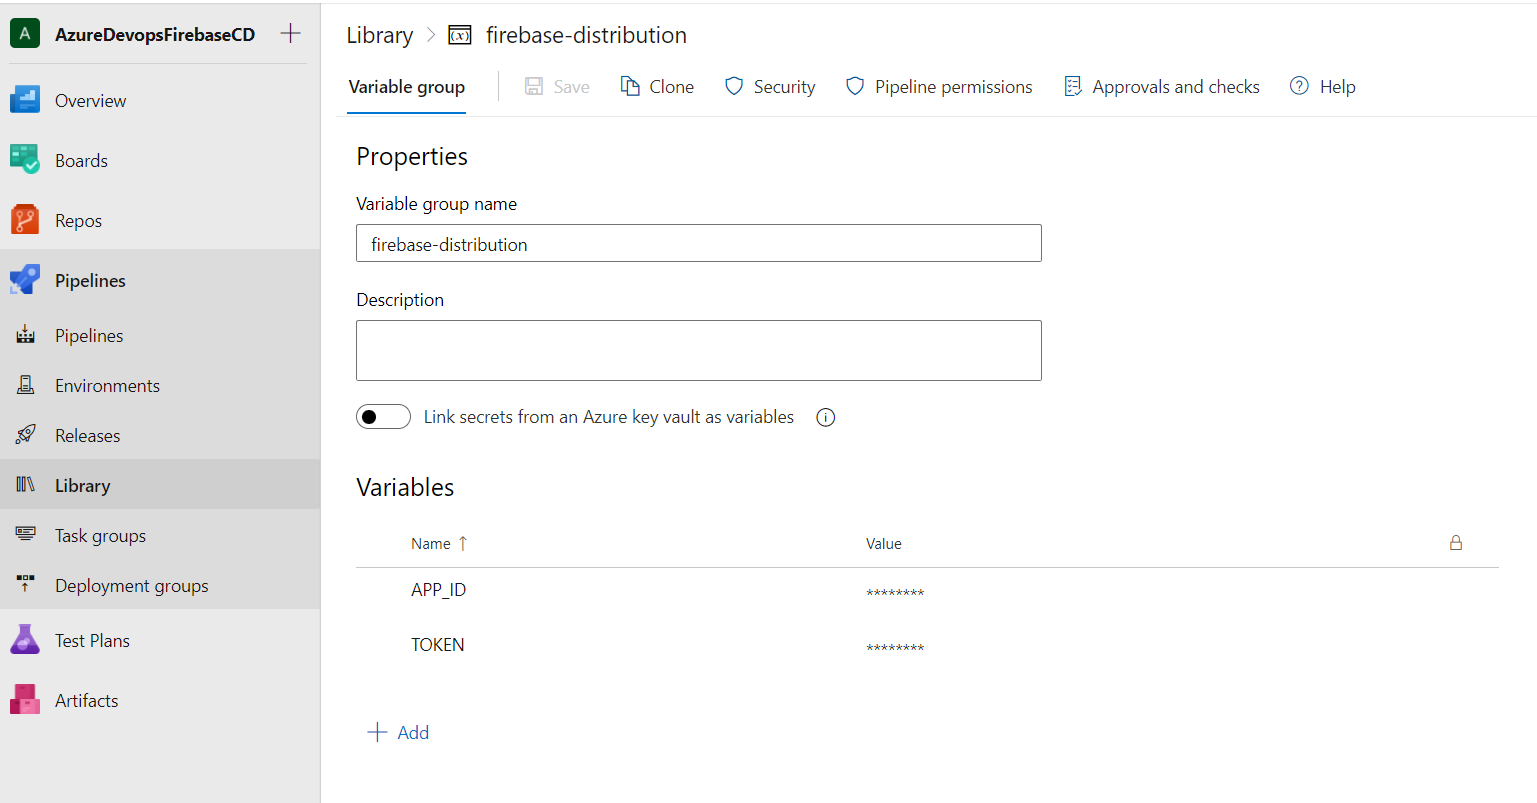
Step 2: Set Variables for pipelines
You can go to Pipelines > Library > + Variable Group, and add your variables.
Step 3: Create pipeline
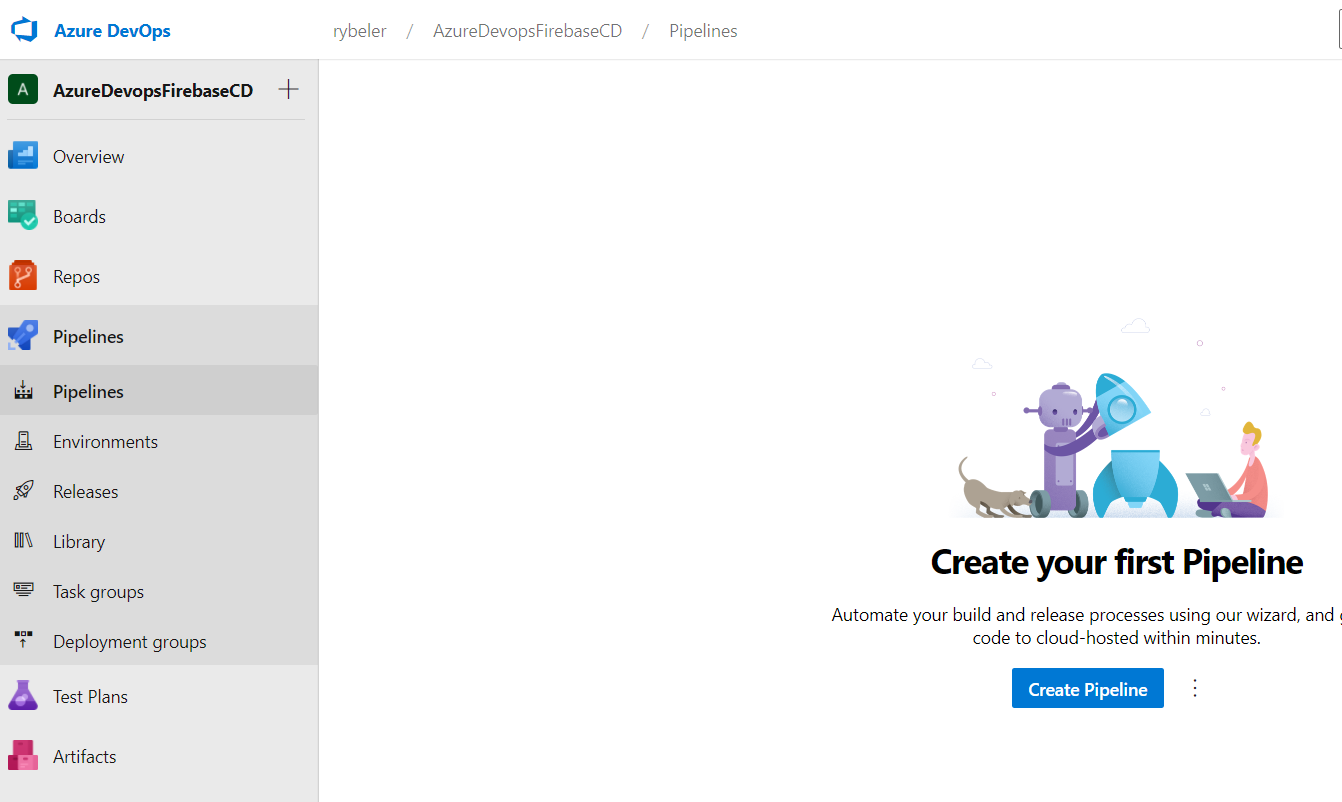
Go to Pipelines > Pipelines > Create Pipeline
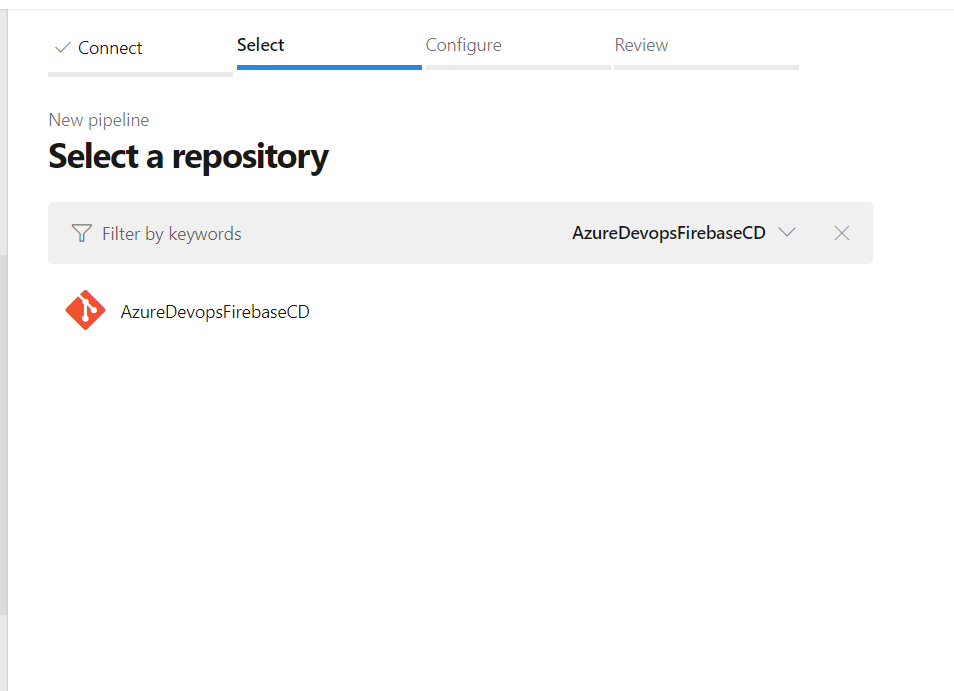
Check Azure Repos Git

Select your repository
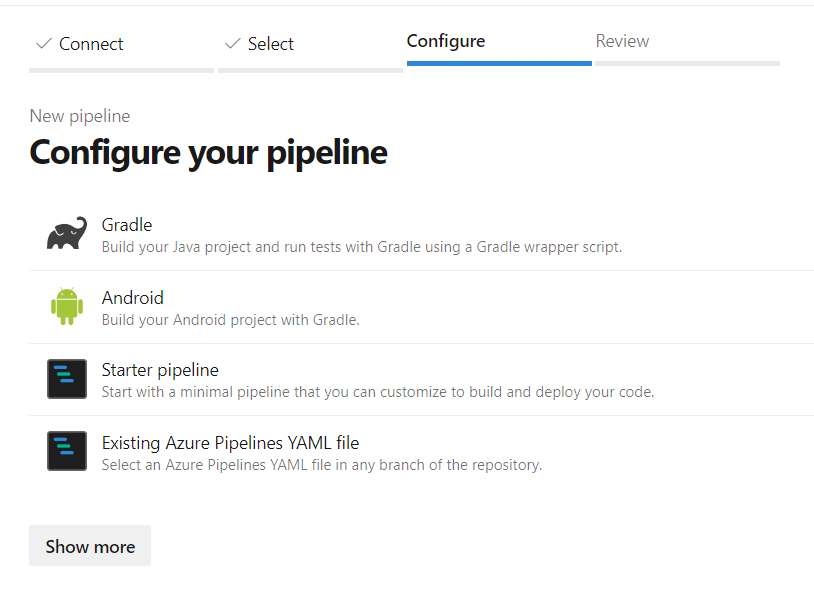
Select the option Android
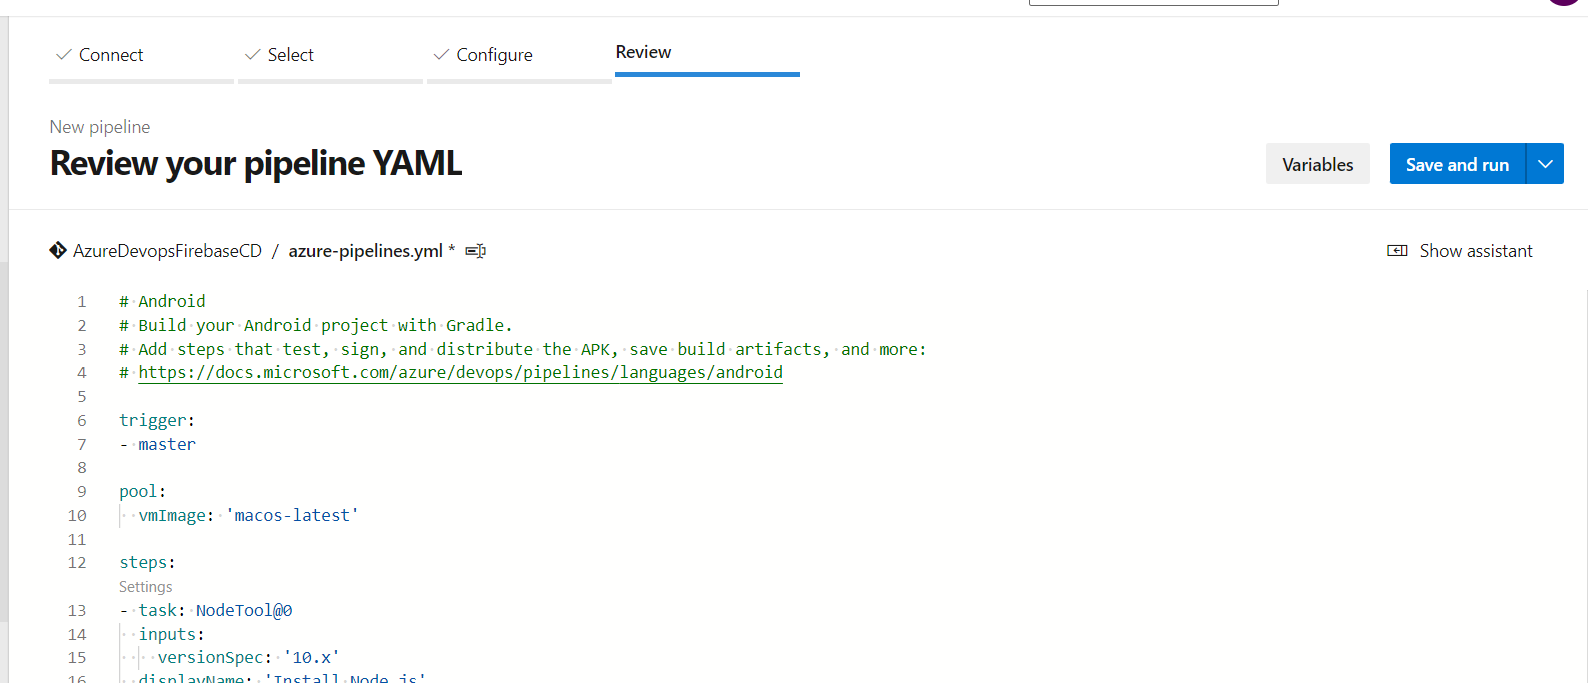
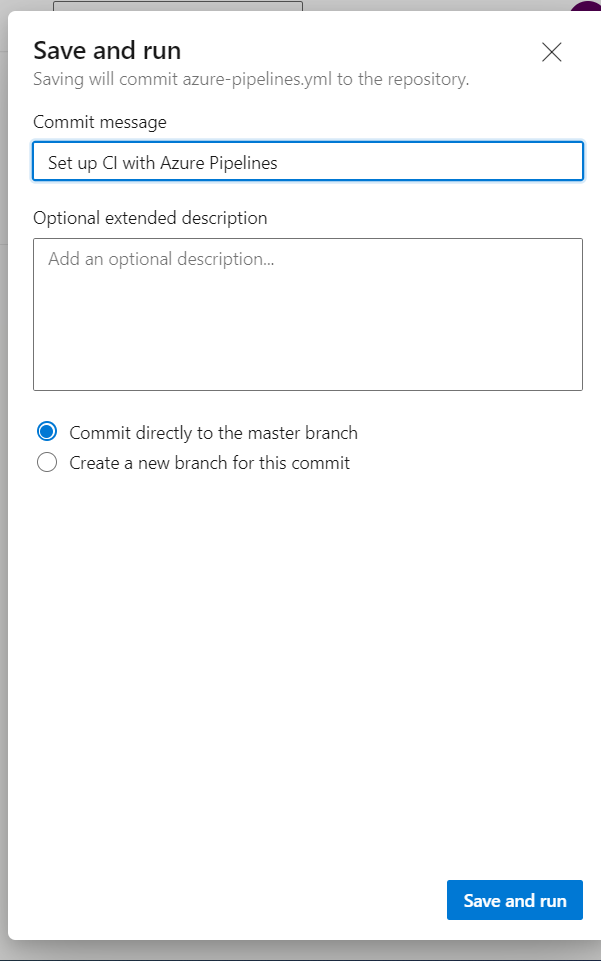
You can replace your pipeline content with the one below, it is pretty basic but it is enough for this demo.
trigger:
  - master

pool:
  vmImage: 'macos-latest'

steps:
- task: JavaToolInstaller@0
  inputs:
    versionSpec: '11'
    jdkArchitectureOption: 'x64'
    jdkSourceOption: 'PreInstalled'
  display:

- task: Gradle@2
  inputs:
    workingDirectory: ''
    gradleWrapperFile: 'gradlew'
    gradleOptions: '-Xmx3072m'
    publishJUnitResults: false
    testResultsFiles: '**/TEST-*.xml'
    tasks: 'assembleDebug'
  displayName: 'Building apk'

- task: NodeTool@0
  inputs:
    versionSpec: '12.x'
  displayName: 'Install Node.js'


- task: CmdLine@2
  inputs:
    script: 'npm install -g firebase-tools'
    workingDirectory: '$(Agent.ToolsDirectory)'
  displayName: 'Install firebase cli'

- task: CmdLine@2
  inputs:
    script: 'firebase appdistribution:distribute $(Build.SourcesDirectory)/../s/app/build/outputs/apk/debug/*.apk --token FIREBASE_TOKEN_REPLACE --app APP_ID_REPLACEC --release-notes "Upload from azure"'
You only need to replace the FIREBASE_TOKEN_REPLACE and APP_ID_REPLACE, with the ones you have
If you get this error while running your pipeline it is because azure devops disabled parallel jobs.
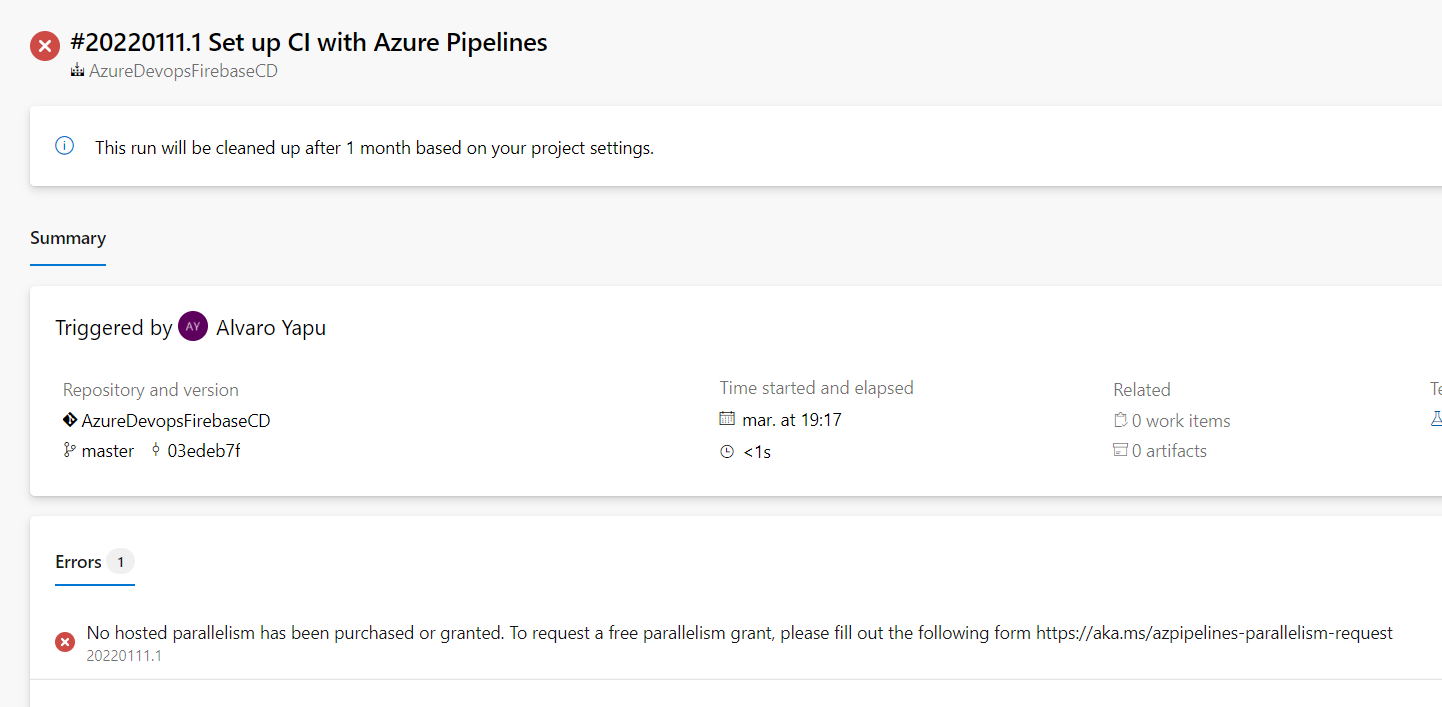
You have two options to solve this matter
- Request azure devops a permission to run parallel jobs
- Stop using hosted agents and use self hosted agents
The first requires to fill a form, and it takes them 2-3 three days to respond, mine took 2 days
The last one is probably my favorite, since you will never depend on azure virtual machines, you have full control over your machine, and there is no time limit. In another blog I'm going to teach that part.
I tried the two options, all of them work, but for simplicity let's go for the first one.
In order to request parallelism, you need to fill this form
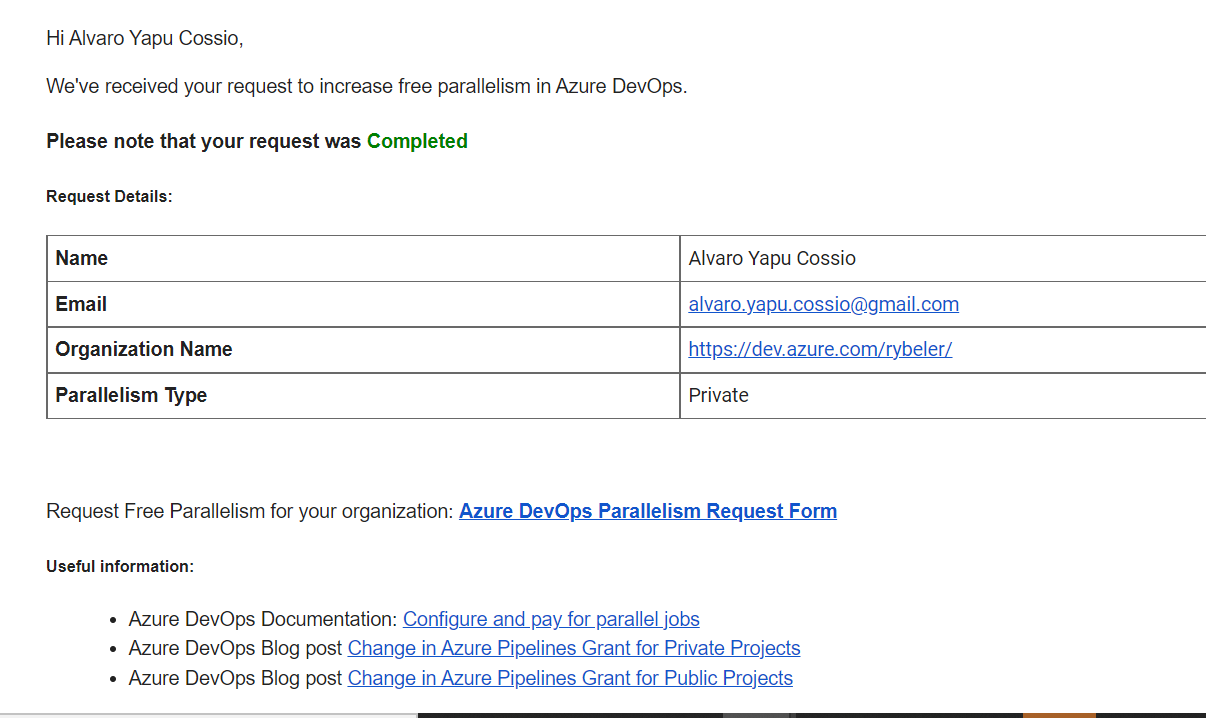
The email response you will get looks like this, and now you are able to run your pipelines. If you don't want to wait, go for self hosted agents
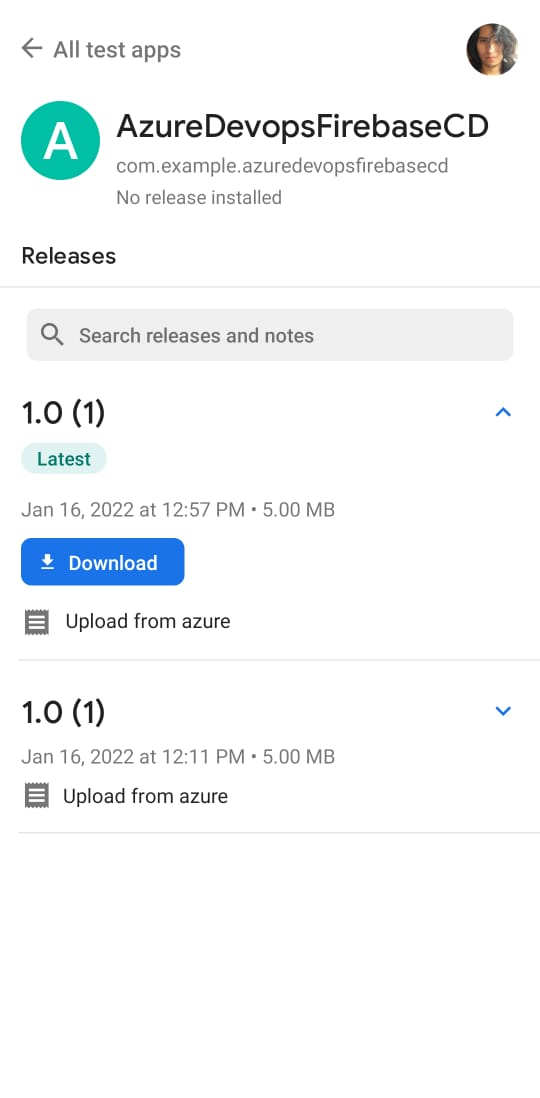
Finally when you successfully run the pipeline, you will get the app in firebase
Use AppTester
If you want to distribute this to people, you need to invite them
App distribution > Invite links > New invite link
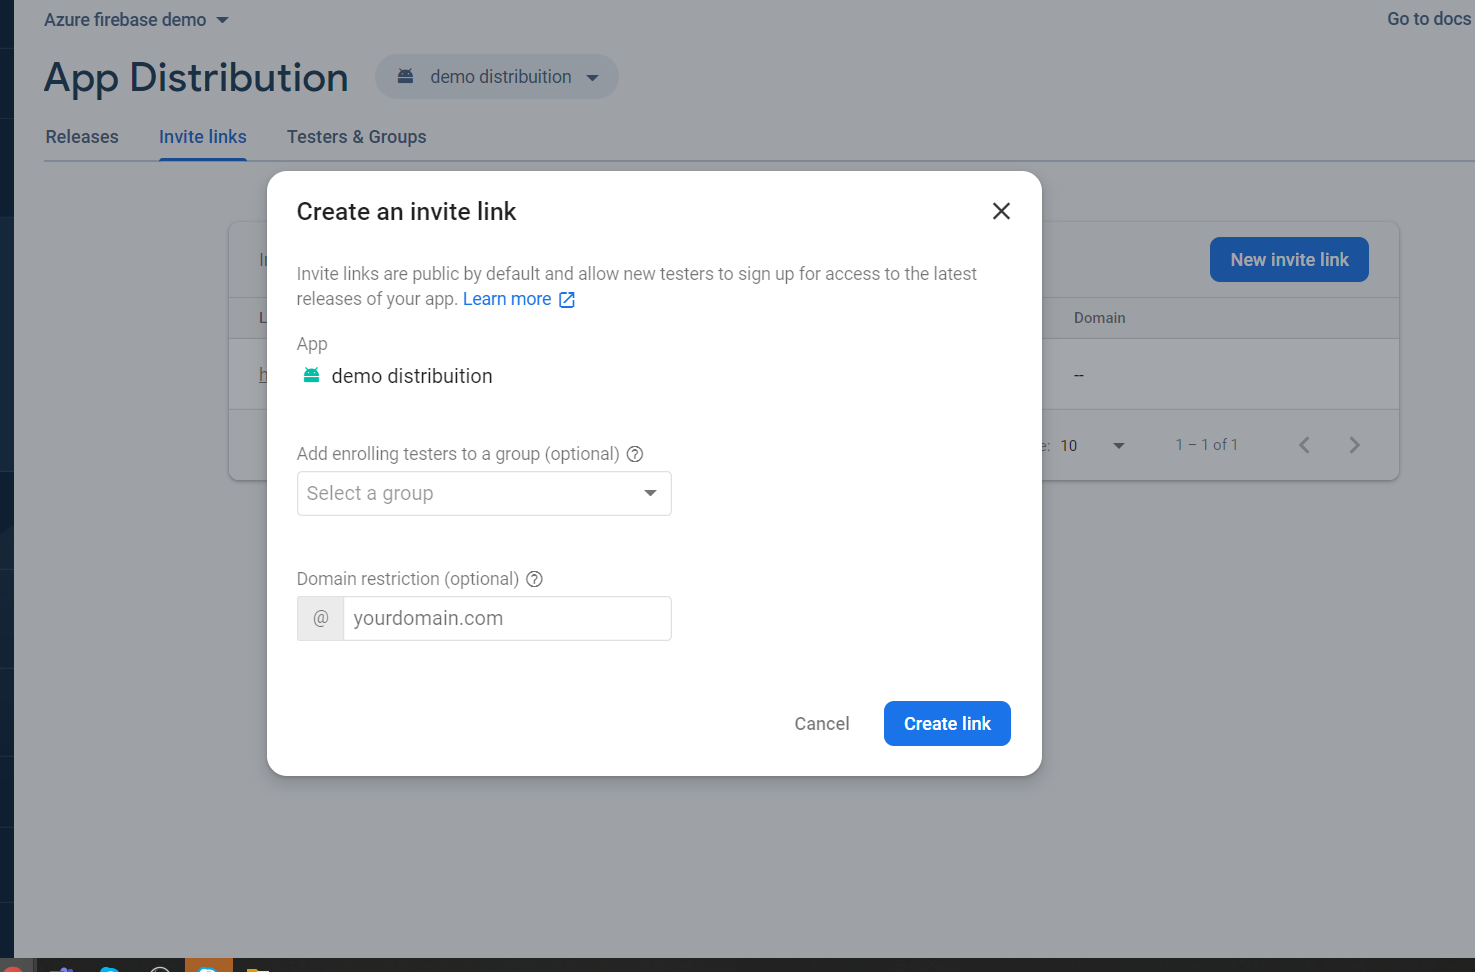
Share the link, and they will get an email invitation, with steps inside, you will download apptester from there.
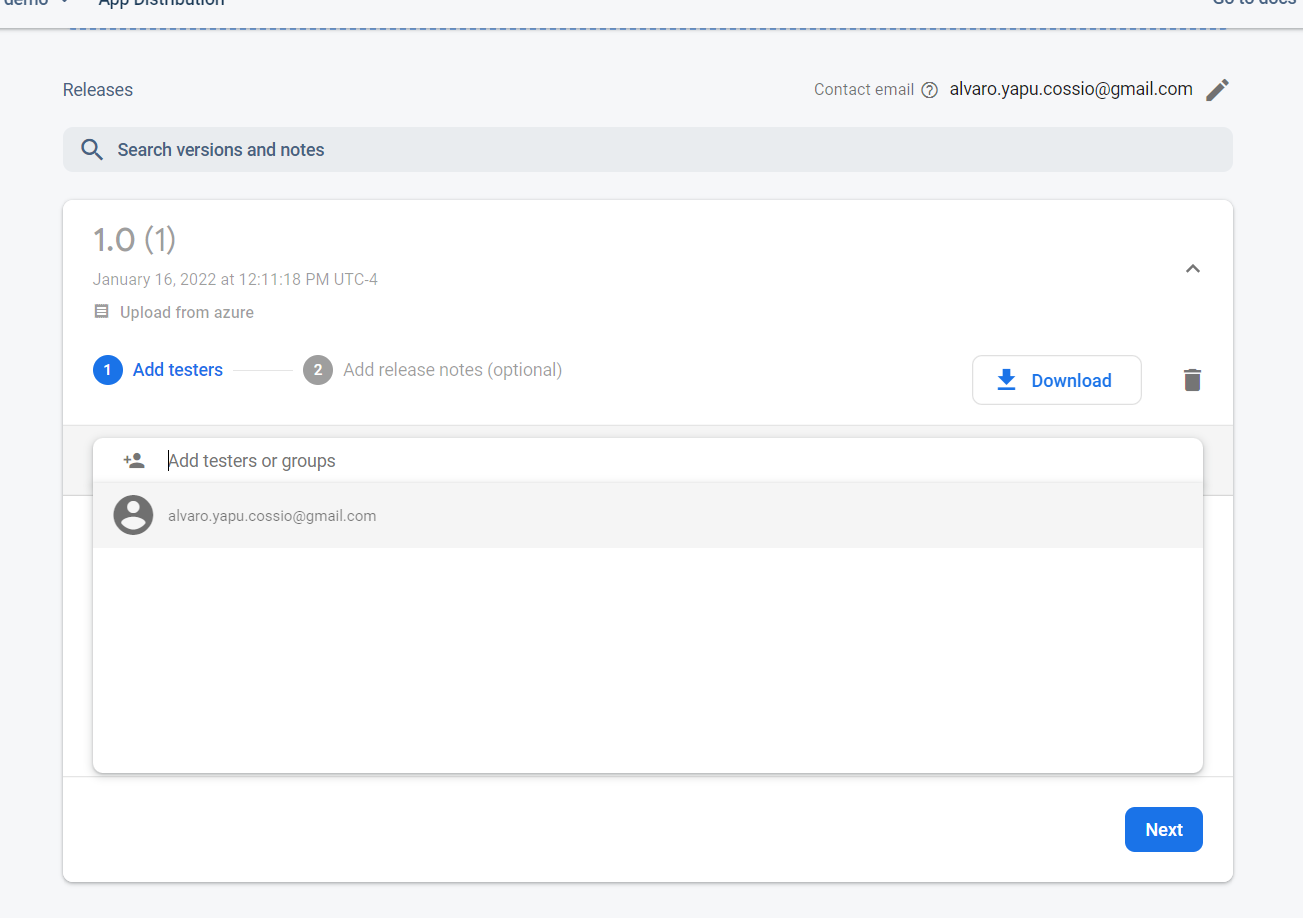
As a last step don't forget to distribute the build to your testers, just click in the build and add testers to notify them
In tester device , accept the invitation
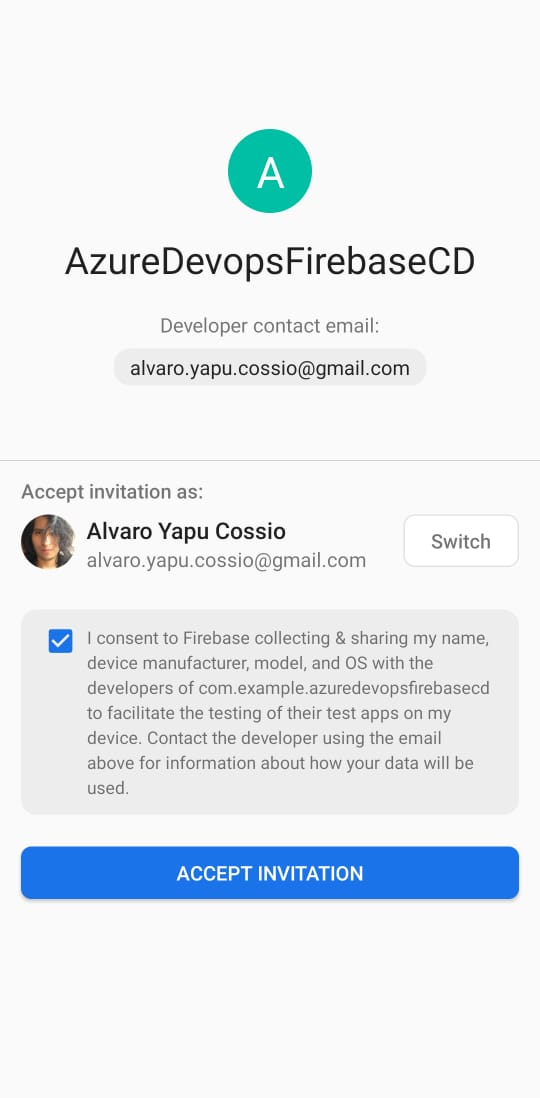
Inside apptester you will see your apps, just download and install them
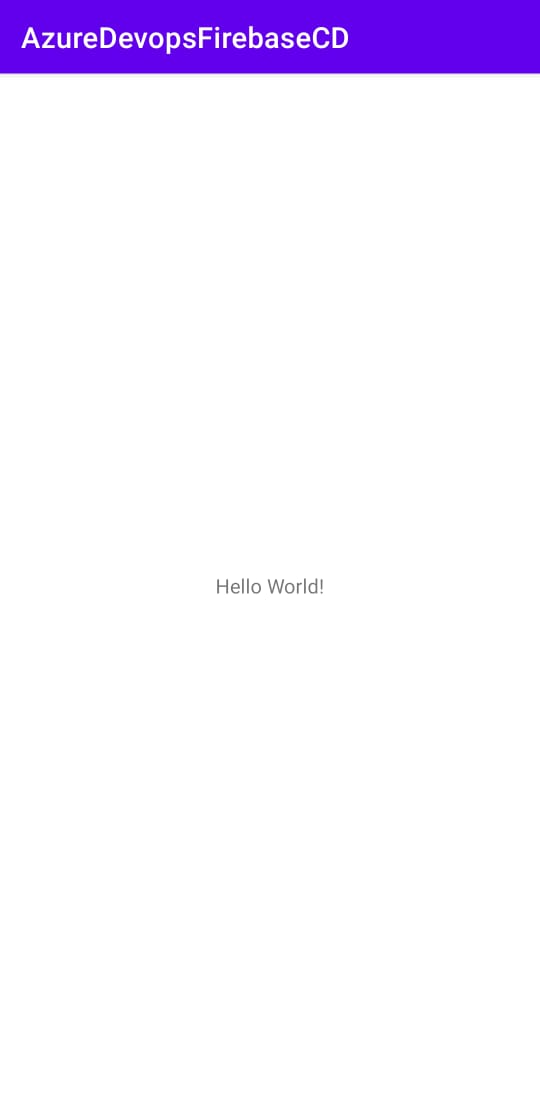
Finally you have your app running in your phone
Conclusions
Well, this was a long post, I just covered the basics of each section, in future blogs I'll explain :
- How to improve the pipeline
- Signing and distributing with different flavors
- How to improve the firebase distribution
- How to set up self hosted machines and how to manage them
“Youth is happy because it has the capacity to see beauty. Anyone who keeps the ability to see beauty never grows old.”
― Franz Kafka
Resources
Finally, thanks for reading my post.
Cristal
Comentarios: